Table of Contents
OpenWrt on UTM on Apple Silicon HowTo
This document describes how to run the armsr/armv8 OpenWrt images in a VM hosted on macOS (Apple Silicon hardware) using UTM.
Prerequisites
- UTM installed
- Familiarity with the command line on macOS (Terminal window)
Select an OpenWrt image
You need an ARM system-ready 64-bit version of OpenWrt. There are two versions:
generic-squashfs-combined-efi.img.gz: This edition uses a squashfs read-only root with a writable overlay.generic-ext4-combined-efi.img.gzThis disk image uses a single read-write ext4 partition with no read-only squashfs root filesystem. Features like Failsafe Mode or Factory Reset won't be available as they need a read-only squashfs partition to function.
In the guide we'll use generic-squashfs-combined-efi.img.gz because it supports sysupgrade.
- Download a stable release of the generic-squashfs-combined-efi.img.gz image from targets/armsr/arvm8/ folder, e.g. 24.10.5.
- Or you can try a more recent release: as of this writing, the pre-release 25.12.0-rc1 image is available.
- Uncompress the gzip'ed img file. On macOS in a Terminal window use the command
gzcat openwrt-*combined.img.gz > openwrt.img. As a result you get the rawopenwrt.imgimage file.
 Tip: keep a copy of the original gzip'ed image file, it can be used as an image for sysupgrade.
VM Setup in UTM
VM creation
Tutorial and screenshots from UTM 4.4.4 on Apple Silicon
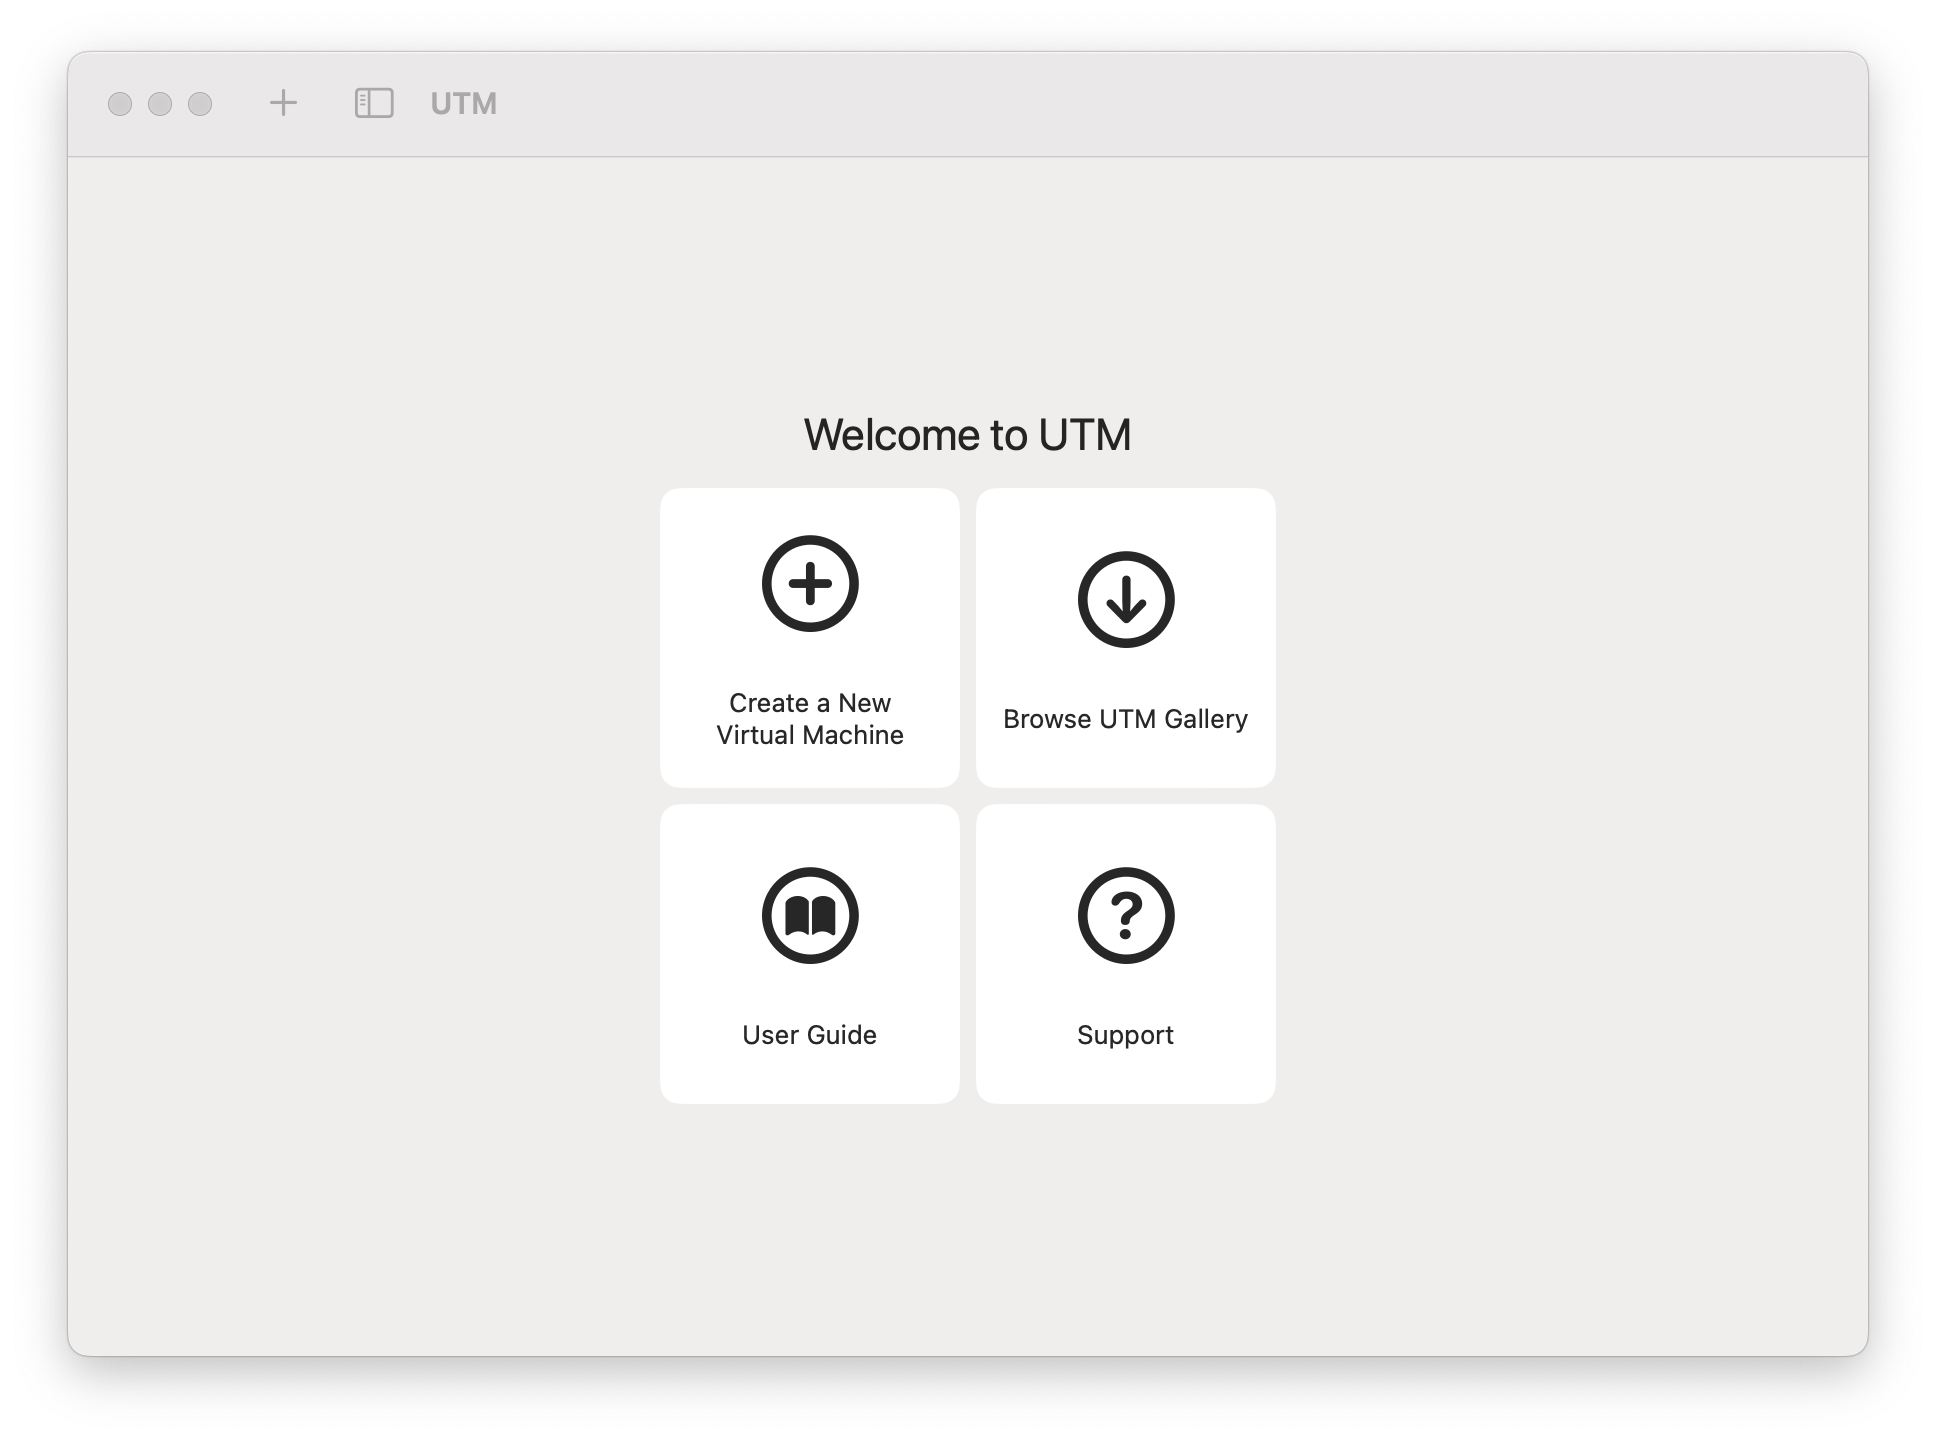 Start UTM and click Create a new Virtual Machine
 Select Virtualize
 Select Other (because the Linux install path assumes an install ISO image, which we are not using for OpenWrt)
 Check the Skip ISO boot box
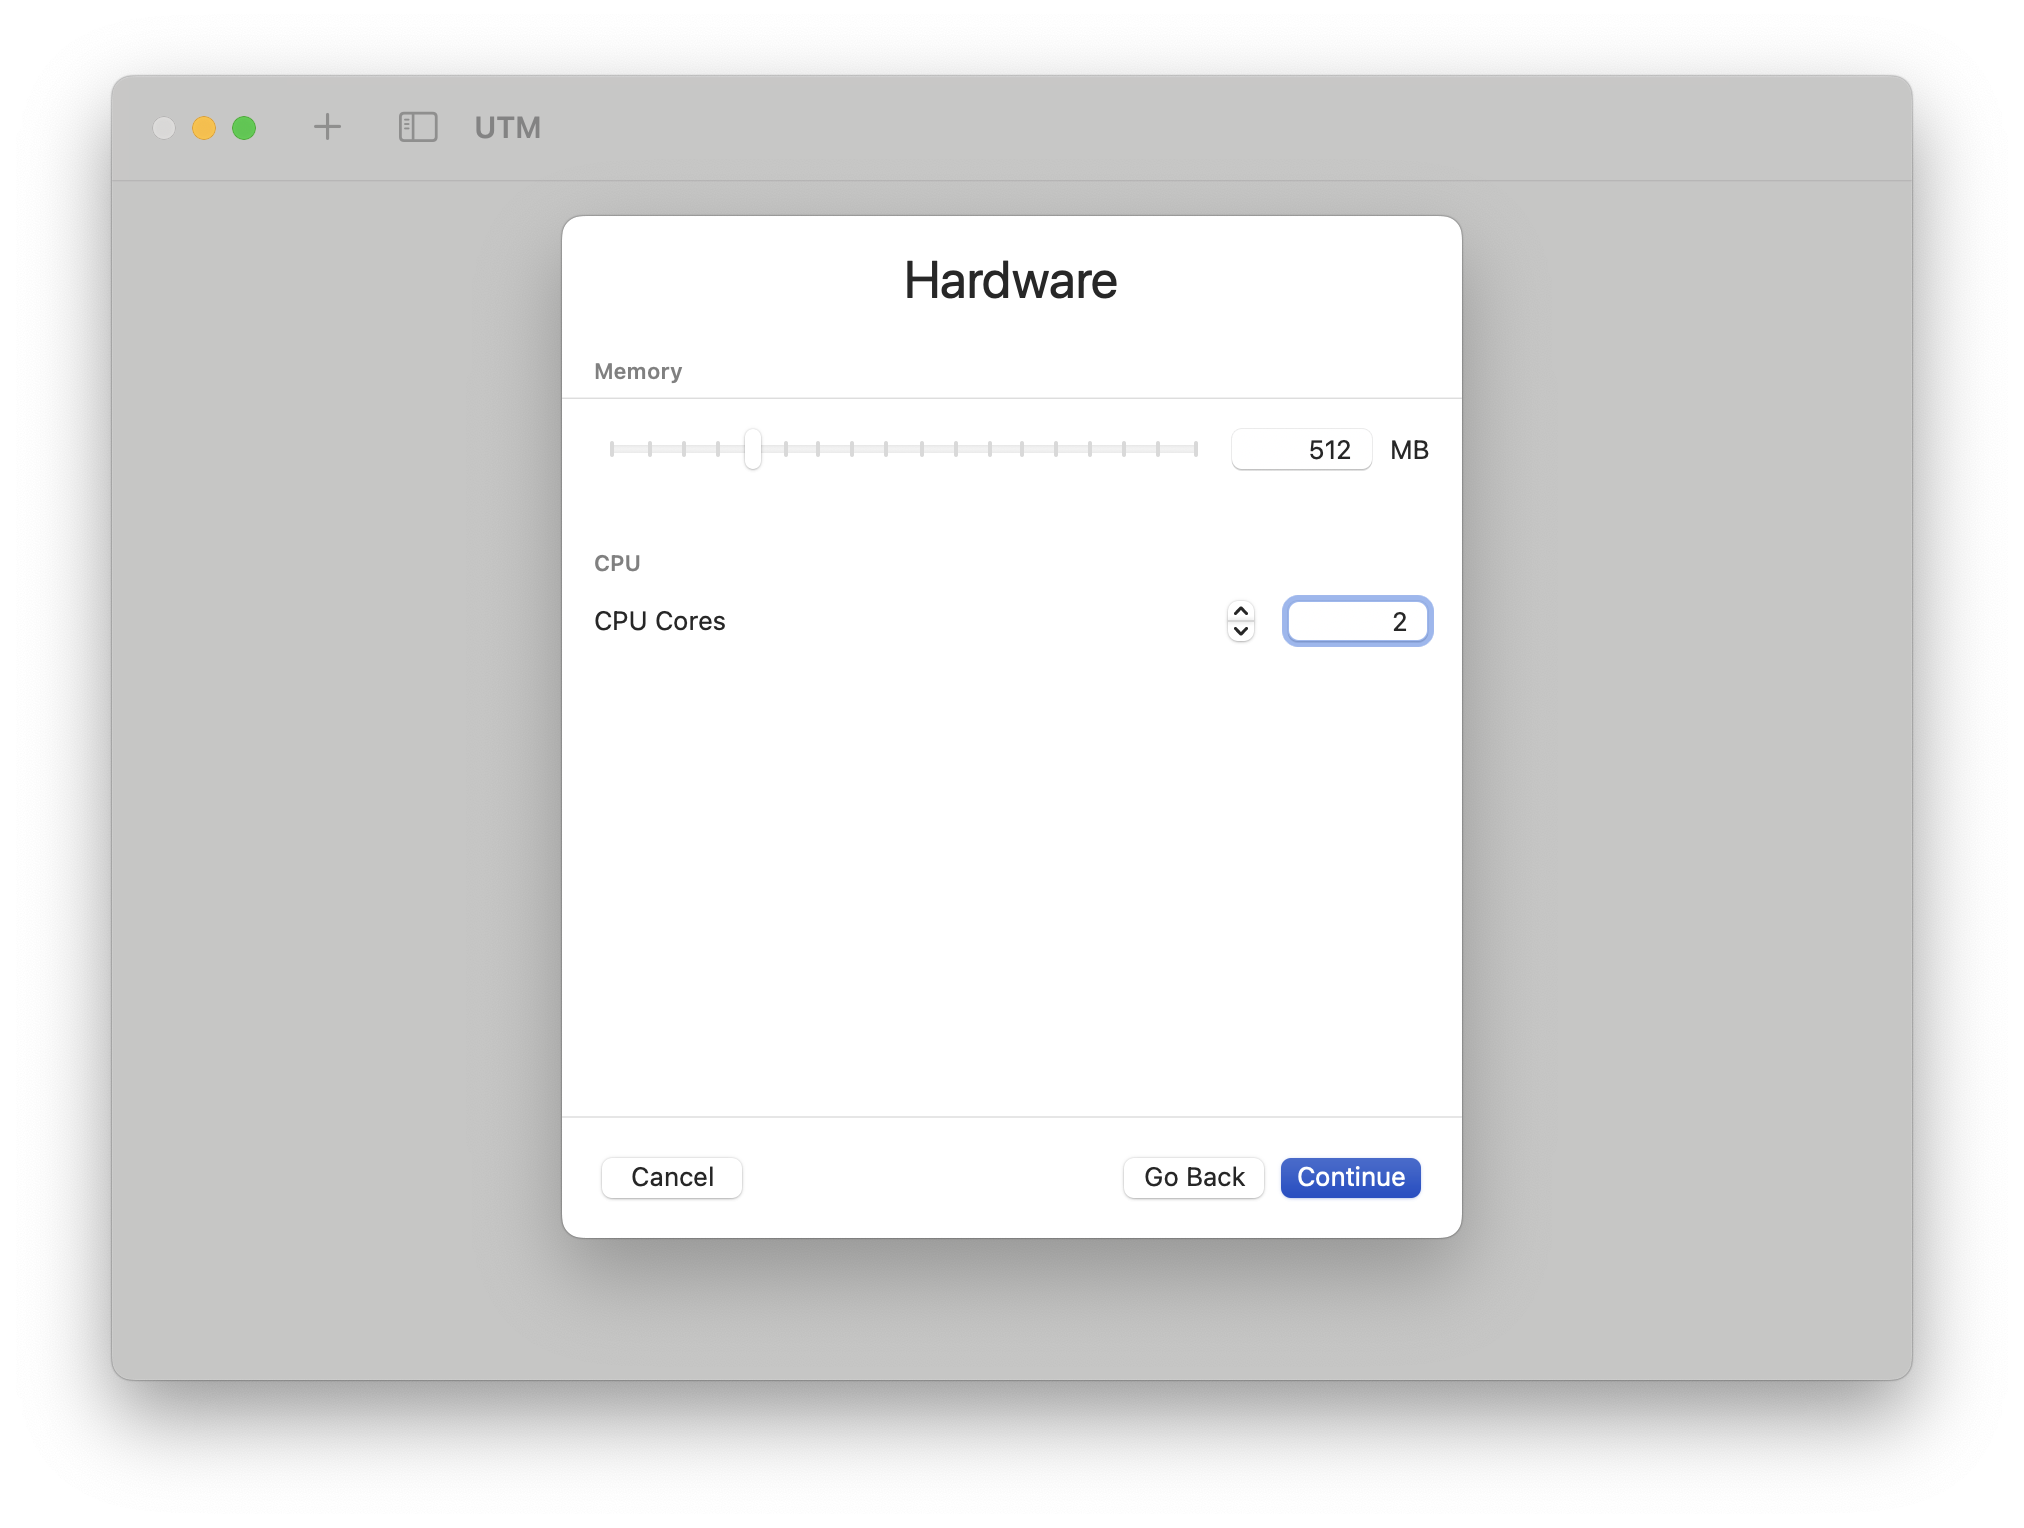 Configure 512MB and 2 CPUs (enough memory for running sysupgrade later)
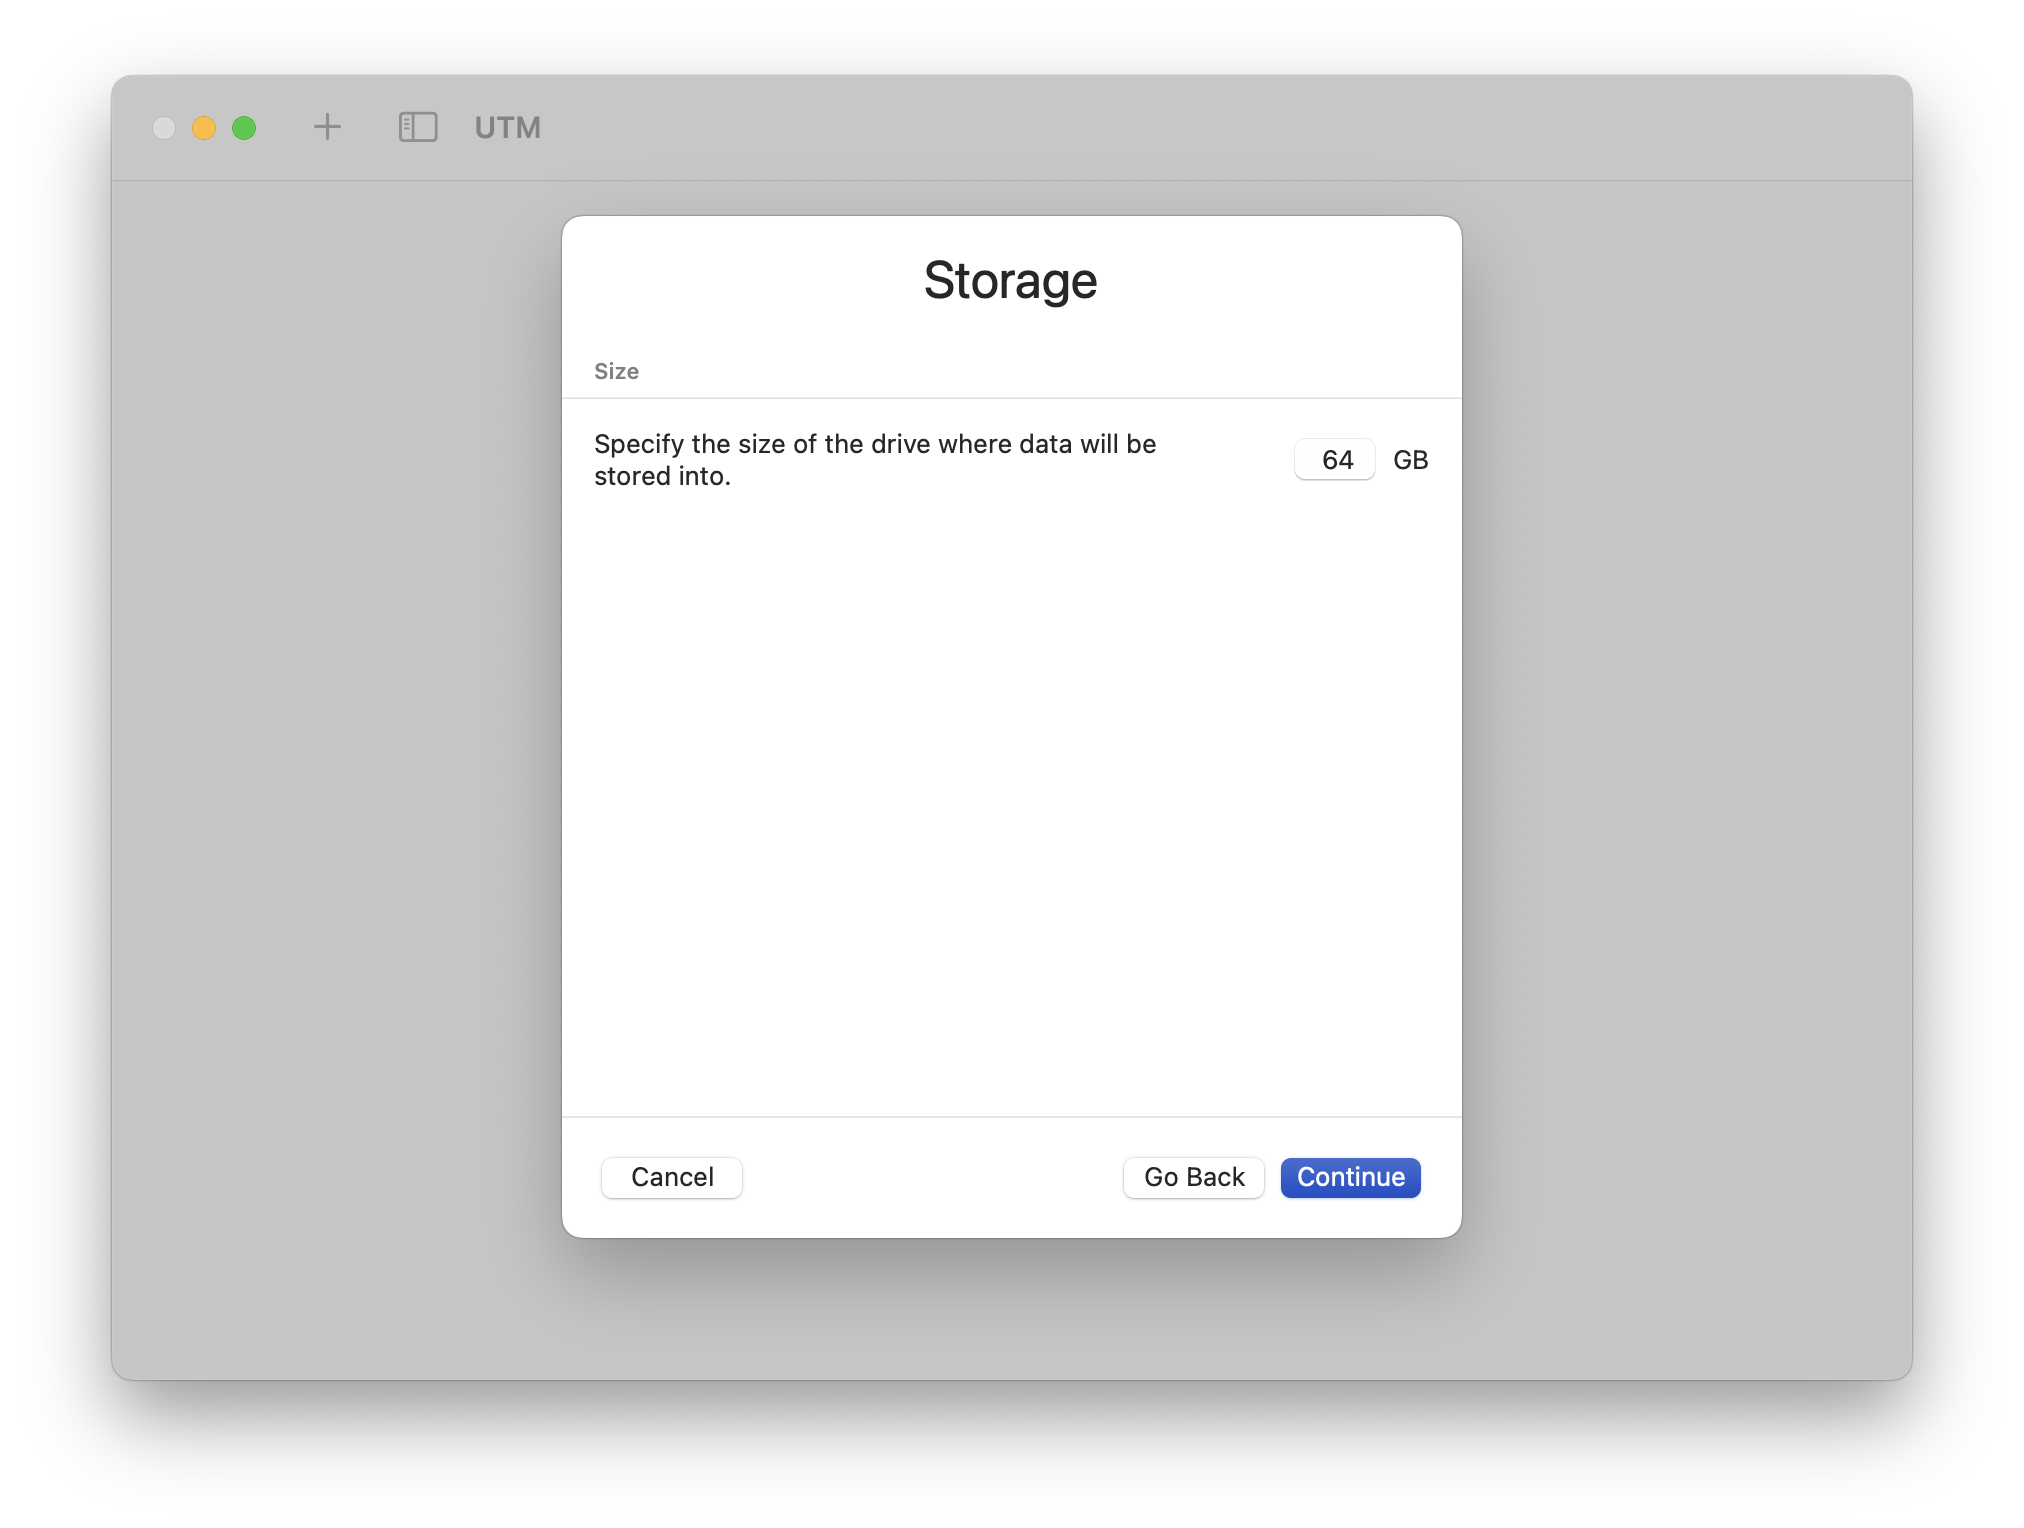 Accept the default storage setting (we will remove this drive later and replace it with the OpenWrt image)
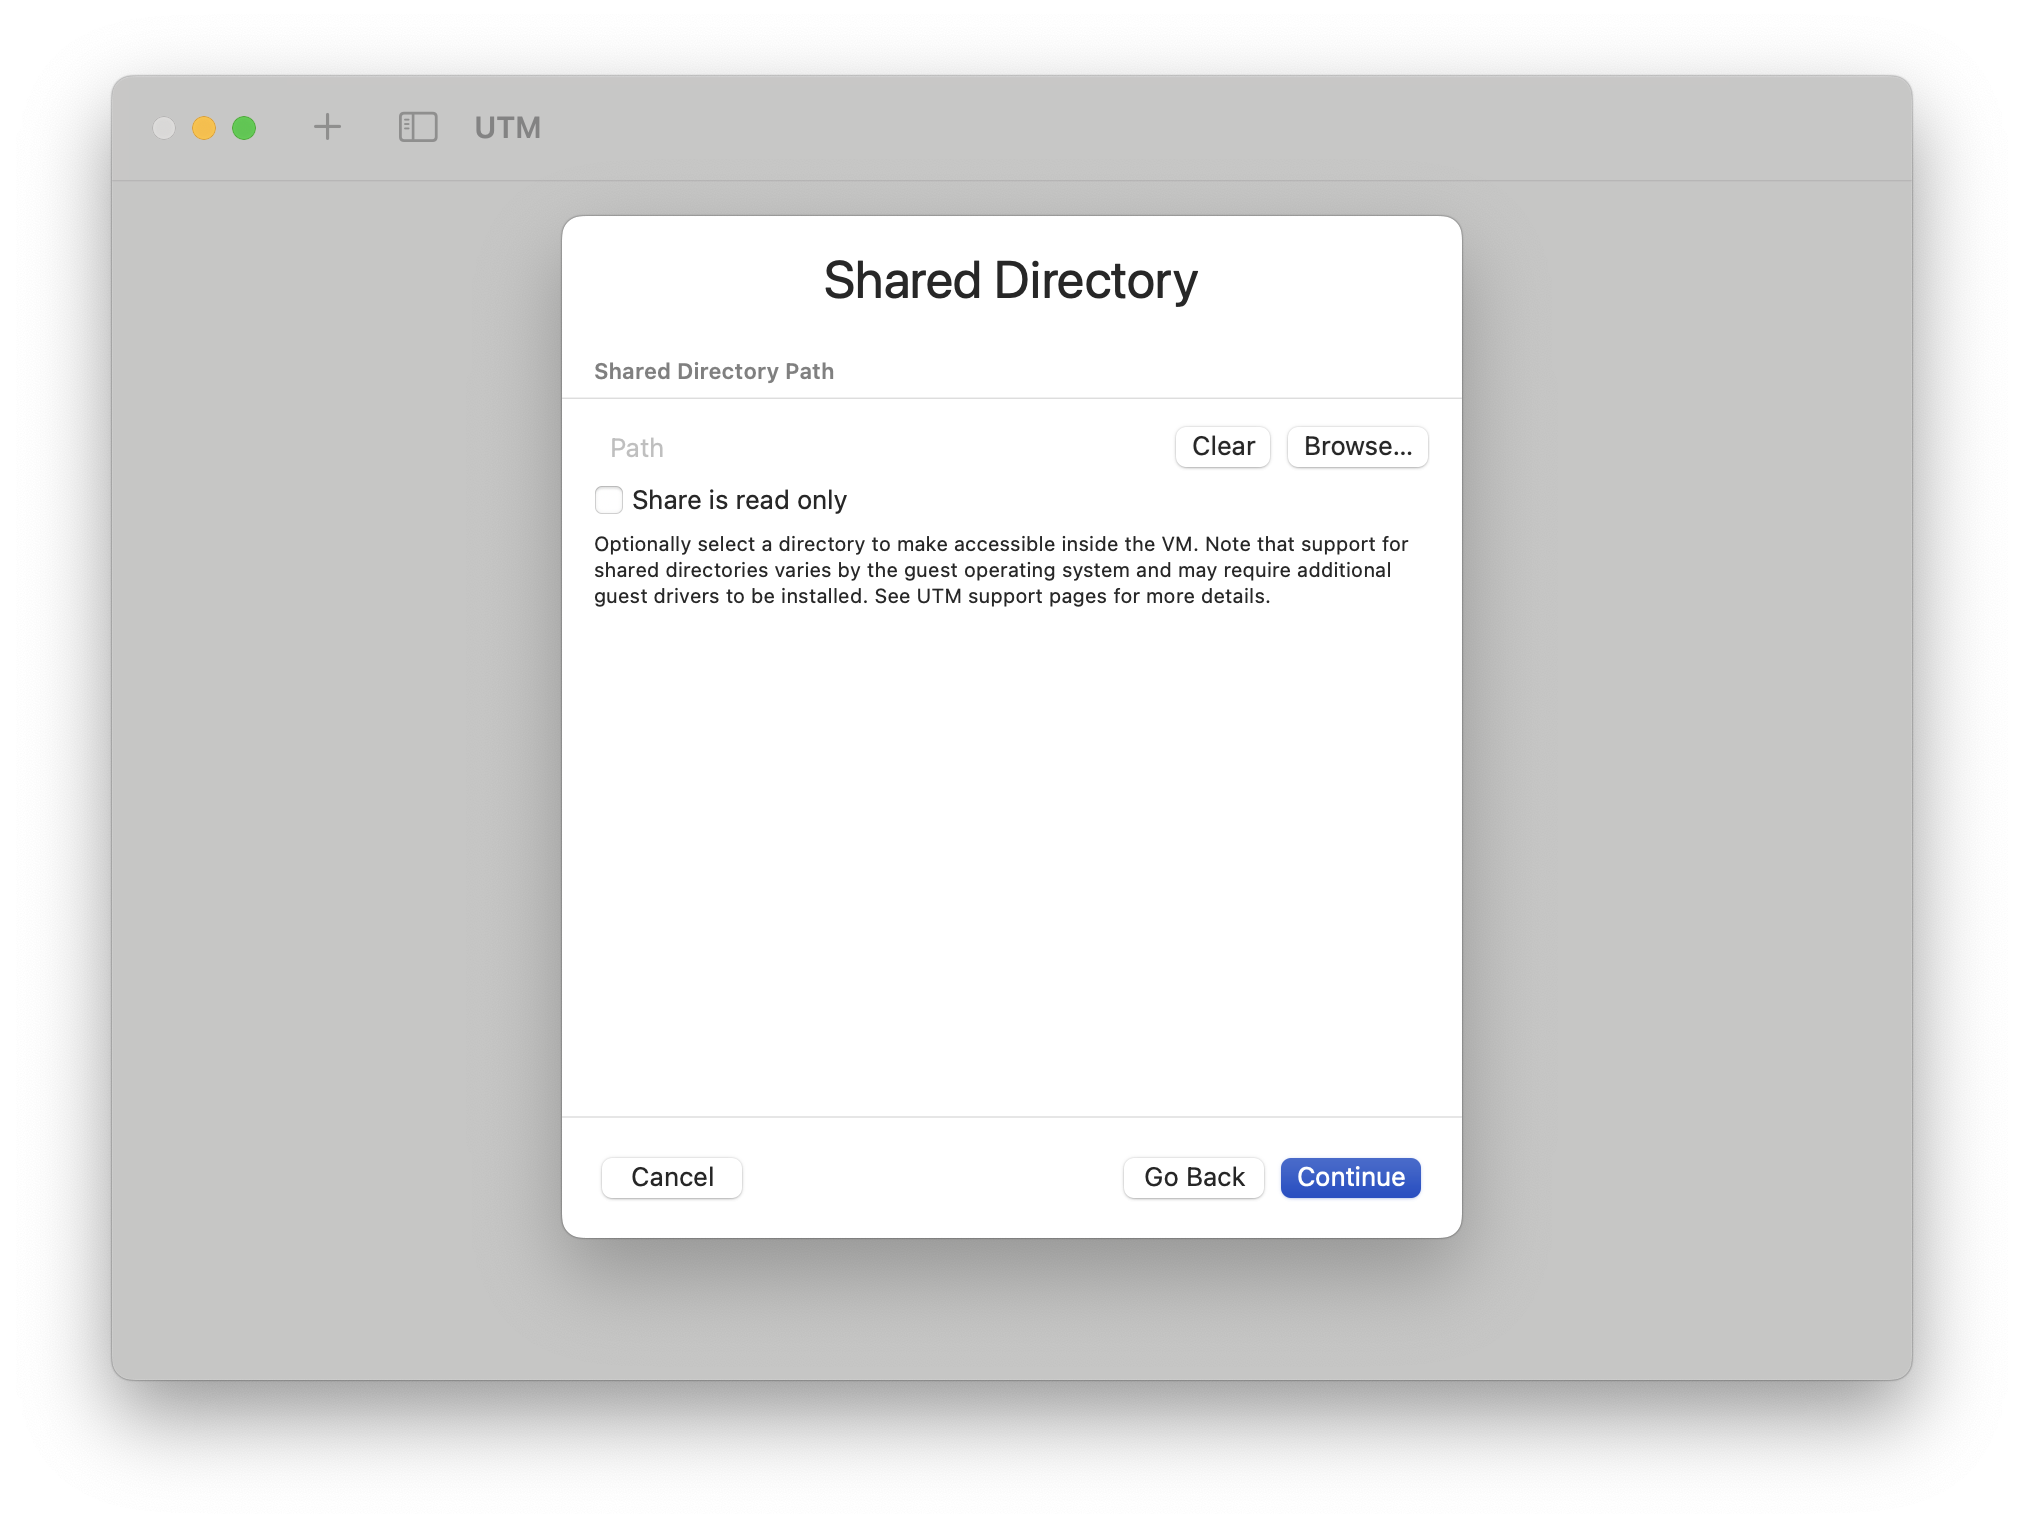 Leave the shared directory configuration blank
 Check the Open VM Settings box. Fill in a name for the VM. Click Save. This brings you to the VM settings page.
VM configuration
The configuration you will set up by following this tutorial is:
- br-lan of the VM on lan interface, fixed address 10.0.2.2, set in UTM as Host Only Network. This interface will always be available to the host even if host or VM are disconnected from any network.
- eth1 of the VM on wan interface, dynamic address, set in UTM as Shared Network (NAT). This interface will be used to access the Internet through whatever setup the host also uses.
Note that the order of the “Host Only” and “Shared Network” networks is important for turn-key operation of OpenWrt in the VM. While it can be configured using the console, configuration in this way simplifies getting to a running configuration.
VM settings
Remove unused devices
 Control-click on Display and remove it. Control-click on Sound and remove it. Control-click on the VirtIO Drive and remove it. Confirm deleting the drive with Delete. (This is the blank disk that UTM creates during VM creation. We don't need it.)
Network Settings
 Select Network. Change the Network Mode to Host Only. Check the Show Advanced Settings box. In the Guest Network box, type in the network range for the VM's LAN: 10.0.2.0/24.
 Under Devices, click the +New entry and add a new Network. Click on the network and confirm it is configured as Shared Network.
Other Device Settings
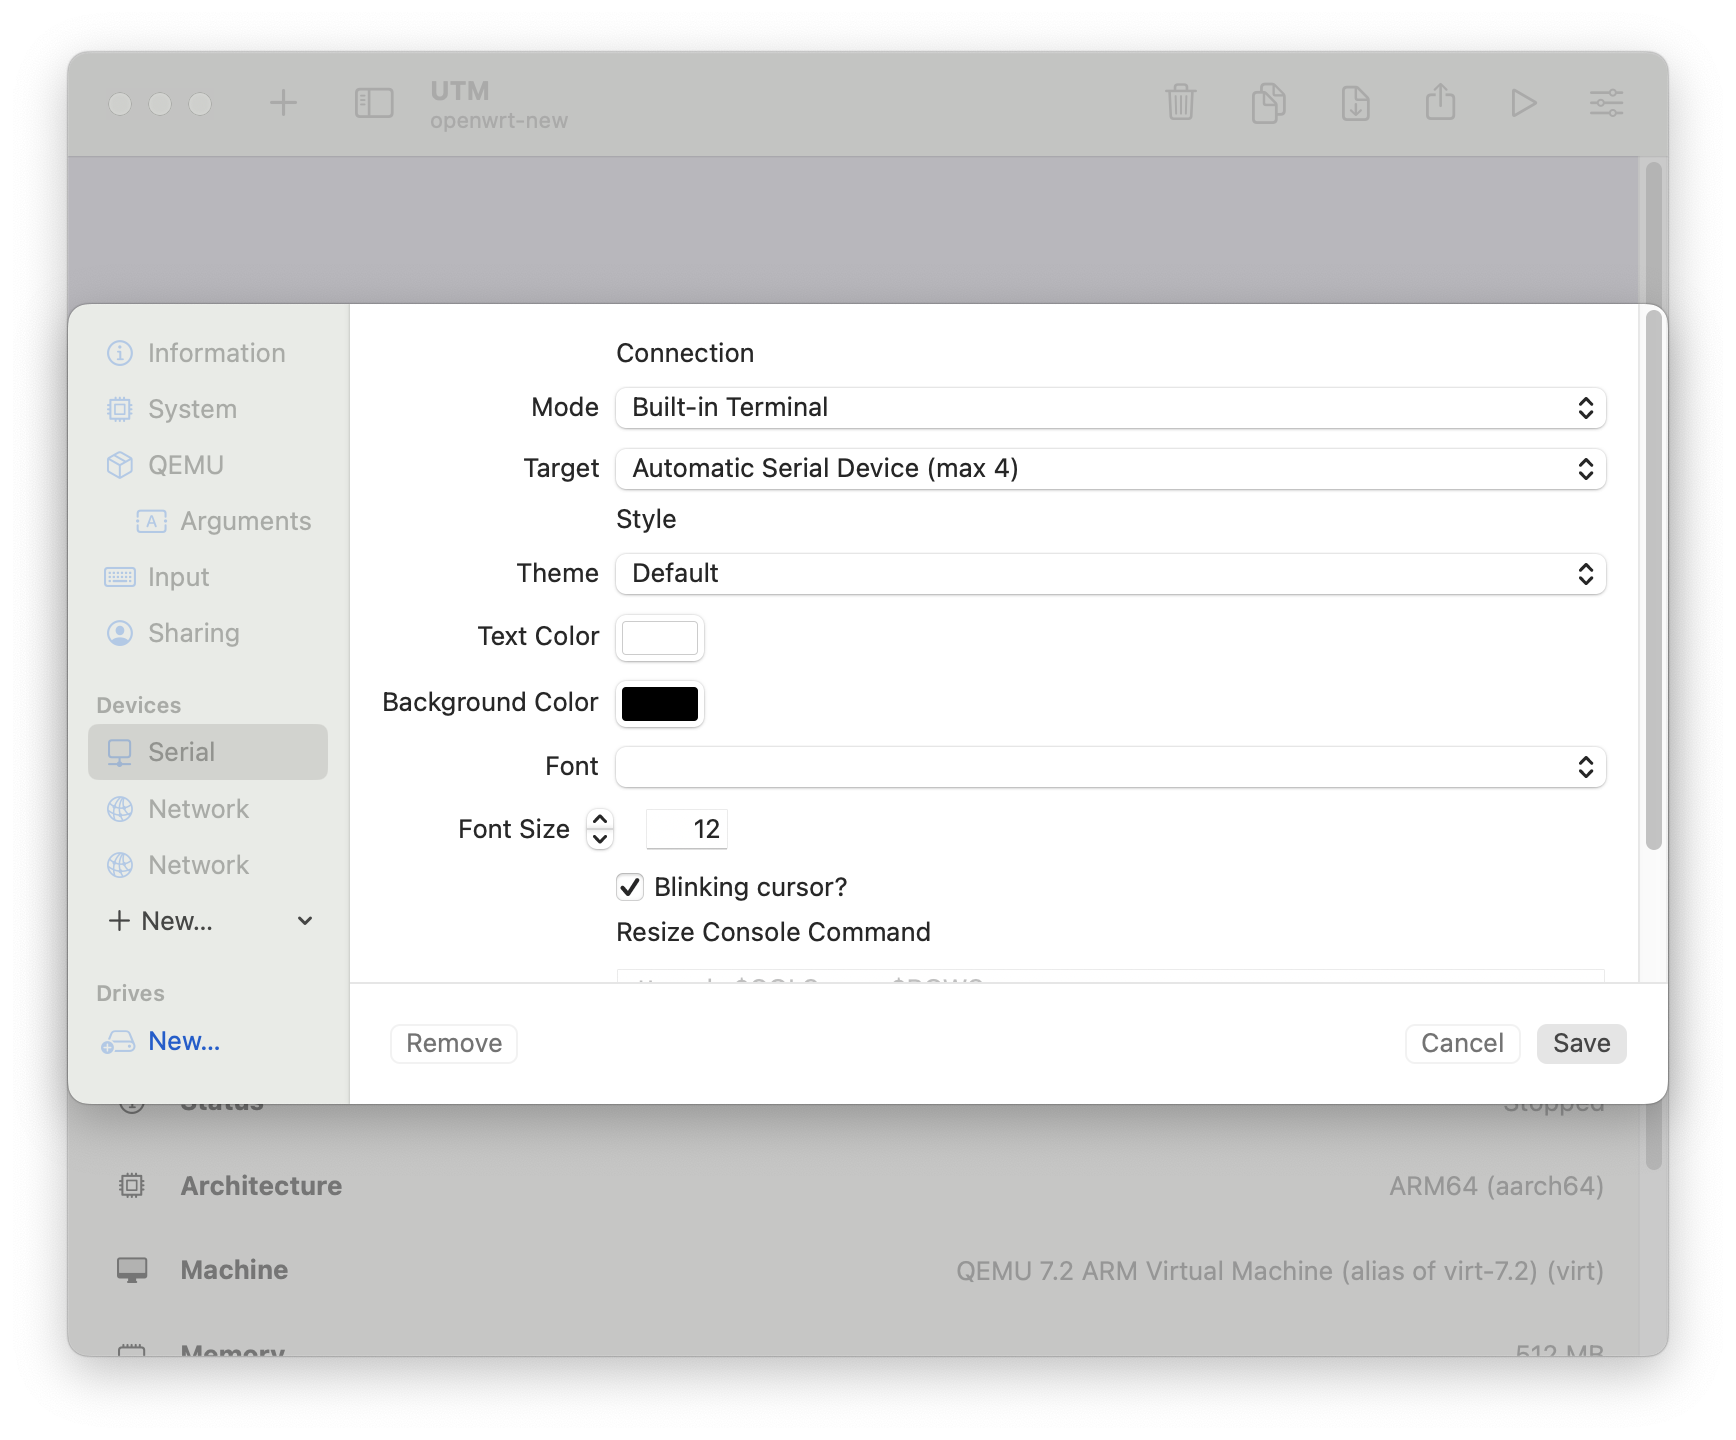 Under Devices, click the
+New entry and add a new Serial device. Click on the Serial
device and check the mode. The default is a built-in terminal
window that supports copy and paste with native macOS keyboard shortcuts.
Under Devices, click the
+New entry and add a new Serial device. Click on the Serial
device and check the mode. The default is a built-in terminal
window that supports copy and paste with native macOS keyboard shortcuts.
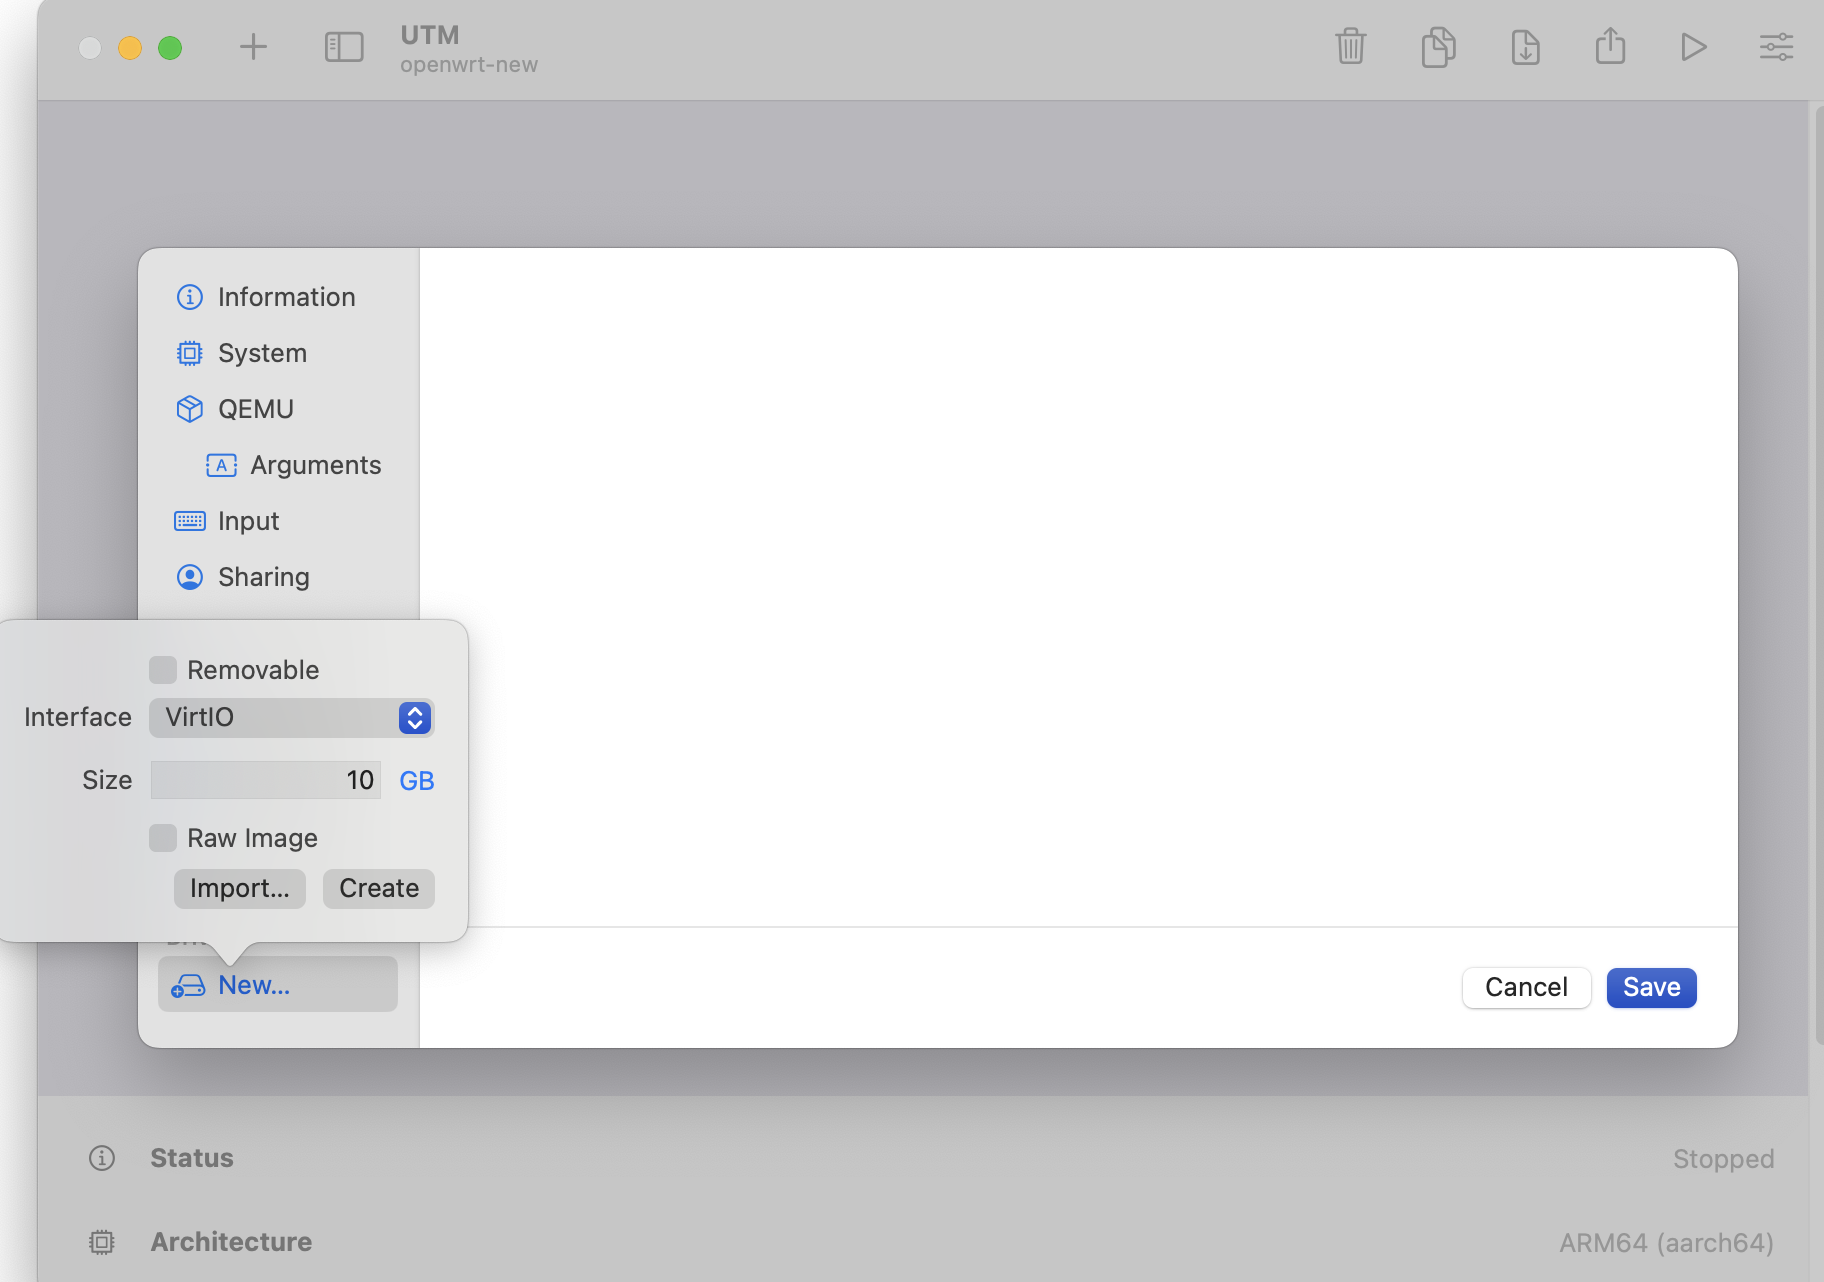 Under the Drives
section, select New.... Accept the interface default (VirtIO) and
click on Import.... Navigate to the
Under the Drives
section, select New.... Accept the interface default (VirtIO) and
click on Import.... Navigate to the openwrt.img file you
unpacked in previous steps.
Save the configuration.
Virtual Machine OpenWrt Settings
- Start your Virtual Machine (click the Play icon button)
- Wait 4 seconds for GRUB to boot automatically
- Press Enter to activate the console when the boot messages have finished scrolling by.
- Display the current LAN network configuration. Note that the default LAN address of 192.168.1.1 is present on first boot.
root@openwrt:~# uci show network.lan
network.lan=interface
network.lan.device='br-lan'
network.lan.proto='static'
network.lan.ipaddr='192.168.1.1'
network.lan.netmask='255.255.255.0'
network.lan.ip6assign='60'
- Edit the network configuration to allow SSH access by pasting these commands into the console:
uci set network.lan.ipaddr='10.0.2.2'
uci commit
service network restart
- Now your VM is accessible from SSH, user root (no password) address 10.0.2.2
- If you installed a release image such as 23.05.0, the LuCi web interface is available at http://10.0.2.2/ (no password)
- If you installed a snapshot that doesn't include LuCi, install it with
opkg update && opkg install luci
- You should have both internet access (try a opkg update) AND a LAN interface with a static address you can connect your SSH client program to even if your PC is disconnected from a local network.
- If you have more complex requirements you will have to set that up on your own by reading the documentation, or through LuCi.
See also
- Other virtualization options: Docker, VMware etc.
- VMware Fusion: Configuring on a VM hosted on VMware Fusion